




Podcaster

















About
Podcast equipment helps you build a clear, organized home studio for interviews, solo episodes, and live conversations. You can compare microphones, interfaces, headphones, and mounting tools in one place, so your setup matches your recording style.
If you're starting small or expanding a multi-host desk, you need gear that fits your space and workflow. You can focus on connection type, setup complexity, and pickup pattern, which matter more than flashy extras.
How to choose podcast equipment by setup type
You should start with the equipment type that shapes your recording chain. Your core choices usually include a podcast microphone, audio interface, headphones, mixer, and a stand or boom arm.
A microphone captures your voice, while headphones help you monitor levels and timing during recording. A stand or boom arm keeps your mic positioned consistently, so your sound stays more even between takes.
If you want a simple desk setup, you may prefer a single microphone, closed-back headphones, and a basic arm. If you're building a larger station, you may need a mixer or interface with several inputs.
- You can choose a microphone first when your voice quality is your main priority.
- You can add an audio interface when your microphone uses XLR instead of USB.
- You can use headphones to hear details like room echo, plosives, and level changes.
- You can mount your mic on a boom arm to free desk space and improve placement.
- You can use a mixer when your setup includes multiple hosts or live controls.
Choosing the right podcast microphone
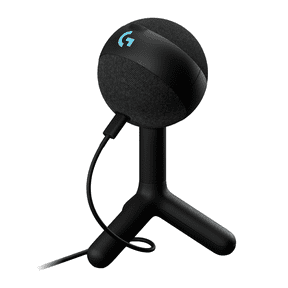
You should compare USB and XLR before anything else, because that choice affects your whole signal path. A USB microphone plugs directly into your computer, so you can record faster with fewer separate pieces.
If you choose XLR, you'll usually need an audio interface to connect your mic. You may also need phantom power with some condenser models, which is a common setup detail.
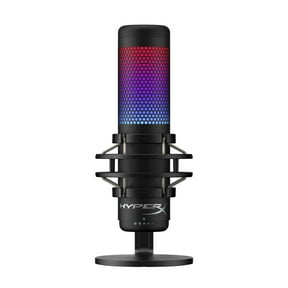
You should also compare dynamic and condenser options based on your room and recording style. A dynamic podcast microphone often helps you capture a focused voice in busier spaces with fans, keyboards, or street noise.
A condenser mic can pick up more detail, which may suit a treated room or soft-spoken delivery. You should check the audio pattern too, because cardioid pickup usually focuses on sound in front of the mic.
If you record group discussions around one table, you may consider omnidirectional pickup for broader coverage. If you want voice-first capture, you'll often prefer cardioid or dynamic formats for tighter focus.
How to compare a podcast starter kit with separate components
You can simplify your first setup by choosing a podcast starter kit with coordinated basics. A bundle may include a usb microphone, headphones, mounting hardware, and cables, which reduces guesswork.
If you already know your preferences, you may want separate components for more control. You can match a specific mic with an interface, choose your own boom arm, and select headphones for longer sessions.
You should think about how much setup work you want on day one. A podcast starter kit usually fits beginners who want faster assembly, while individual pieces fit shoppers who plan to upgrade step by step.
You may also compare a podcast bundle against your desk space and recording routine. If your space is compact, you may prefer fewer boxes, fewer cables, and a cleaner connection path.
What to look for in podcasting gear features
You should check connection type, input count, and monitoring options before you choose podcasting gear. Those details affect whether you can record alone, invite guests, or capture several voices at once.
If you're a solo podcaster, one input and direct headphone monitoring may cover your needs. If you host interviews or roundtables, you should look for enough inputs for every microphone source.
You should measure your desk and arm reach before choosing stands, boom arms, or mixers. Your setup feels easier to use when your controls stay within reach and your mic stays close to your mouth.
You may also compare onboard controls like gain knobs, mute buttons, and headphone volume. Those features help you make quick adjustments without opening extra software menus during a recording.
When you review headphones, you should look for a comfortable fit and clear monitoring. Your headphones should help you hear timing, mic handling sounds, and background details while you record.
Matching podcast equipment to your recording style
You can match your podcast equipment to the kind of show you plan to produce each week. A solo creator may want a USB setup, while a panel show may need XLR microphones and more inputs.
If you record tutorials or voiceovers at a desk, you may want a simple mic arm and direct computer connection. If you record interviews with guests, you should check for multiple headphone outputs and stable mic placement.
You may prefer Bluetooth options for flexible monitoring or mobile workflows, but you should confirm compatibility with your recording device. If you want a traditional studio path, wired connections often keep your setup more predictable.
For streaming and podcast recording in the same space, you should compare controls that are easy to adjust mid-session. Your mixer or interface can help you manage several voices without changing your whole workflow.
If you create content in a shared room, you may lean toward dynamic microphones and close mic placement. If your room is quieter, you may explore condenser detail and a wider range of vocal texture.
How your setup decisions work together
You should think of your recording chain as connected choices, not separate purchases. Your microphone type, connection method, and host count all shape which accessories and controls make sense.
When you compare podcast equipment this way, you can avoid mismatched parts and unnecessary setup steps. Your final setup can feel easier to use, easier to expand, and more consistent from episode to episode.