Window insulation kit for summer & winter | Walmart


About Window insulation kit for summer & winter | Walmart - Walmart.com
Window insulation kits help you cover drafty glass with a tight barrier that fits your season, window count, and installation style. You can compare shrink film, magnetic options, and tape-only sets to match painted trim, patio doors, and everyday tools.
If you want clearer winter prep, you can use this guide to compare kit type, location, capacity, and film thickness. You’ll also learn how double sided window tape, hair dryers, and removable film affect your setup.
How to choose window insulation kits
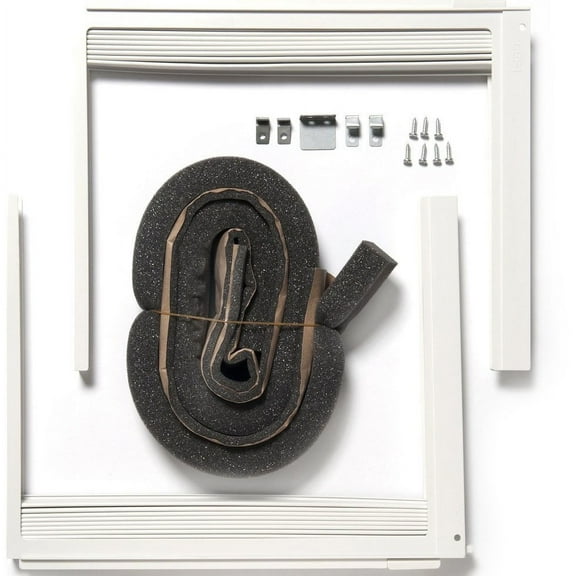
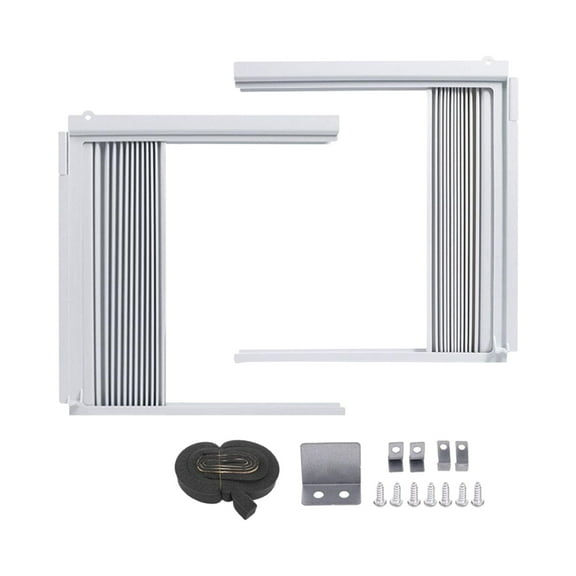
When you compare window insulation kits, you should start with the kit type that matches your window frame and your preferred setup. You can pick shrink film for a smooth look, magnetic window insulation for repeat use, or tape-only refills for replacements.
Shrink film works well when you want a clear layer that tightens with warm air from a standard household hair dryer. Magnetic styles suit metal frames when you want seasonal removal without trimming new film each time.
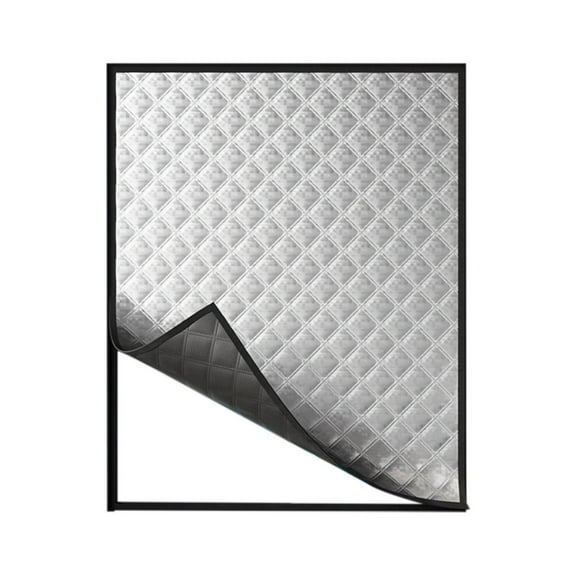
Bubble wrap styles can help you cover utility spaces where you care more about coverage than a near-clear finish. Tape-only packs help you refresh an existing indoor window insulator kit when you still have usable film.
- You can choose shrink film when you want a taut, low-profile look on living room or bedroom windows.
- You can choose magnetic window insulation when your metal frame makes seasonal removal and reattachment easier.
- You can choose bubble wrap styles when you want quick coverage on basements, garages, or utility windows.
- You can choose tape-only kits when you need fresh adhesive lines for another round of installation.
Choosing the right window shrink film kits
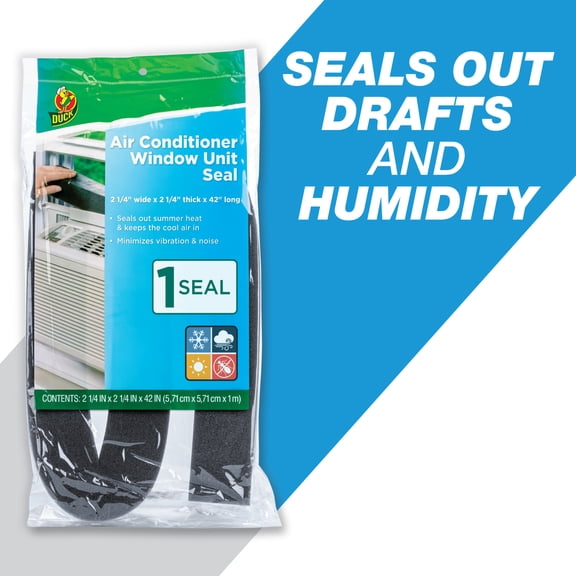
You should check film thickness before you decide between standard and heavy duty window insulation kit options. Standard 0.6 mil film works for many everyday windows, while 1.5 mil film gives you a sturdier feel.
If you cover busy areas or larger openings, you may prefer heavier film that feels less delicate during trimming. If you want easier handling on small panes, standard film can feel simpler to position.
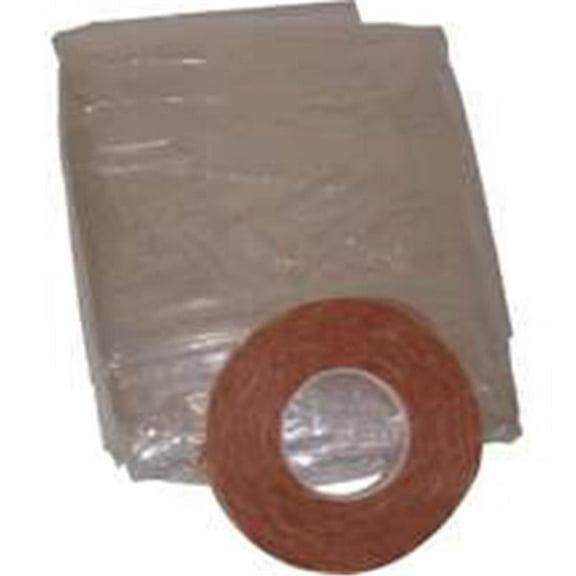
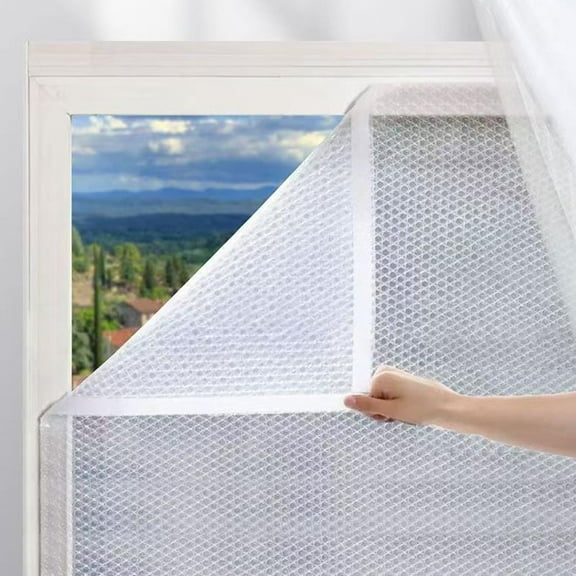
You should also compare clarity, roll width, and included tape before you install. A plastic window covering for winter should sit flat, shrink evenly, and leave your view less interrupted.
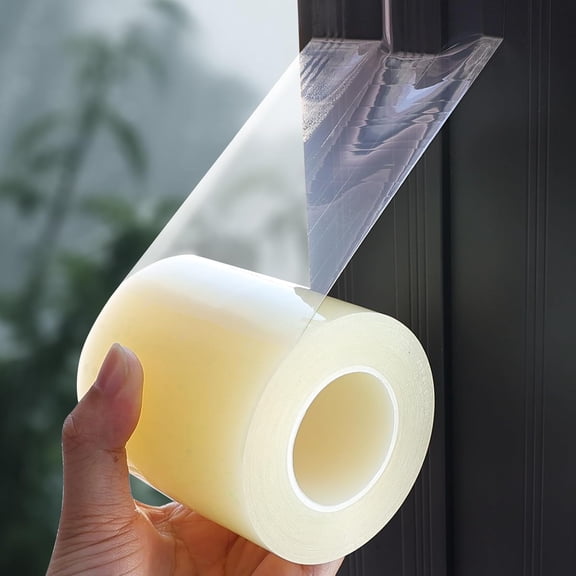
Look for double sided window tape that matches the film and the intended surface. You’ll want tape that adheres cleanly around trim and peels away with careful removal at season’s end.
Choosing indoor or outdoor installation
You should check whether your kit is designed for indoor or outdoor use before you measure. An indoor window insulator kit usually installs faster because you can work in a dry, controlled space.
Indoor kits often appeal when you want to preserve curb-facing windows without exterior ladder work. Outdoor options can make sense when your window style or frame shape limits interior placement.
If you’re covering painted trim, you should read surface guidance and test a small area first. You’ll want a kit that suits sealed, clean trim so the adhesive line stays even during installation.
You should also consider your tools before you choose a location. Many window shrink film kits need only scissors, a measuring tape, and a standard household hair dryer.
Choosing the right window capacity
You should match the package capacity to the number and size of openings you plan to cover. A one-window kit suits a single problem area, while three-window and five-window packs help you plan larger rooms.
If you’re covering wide glass, you should check for patio door insulation kit sizing before you buy. You’ll need extra width and length so the film spans the opening without awkward seams.
Measure frame width and height before you cut anything from the roll. You’ll get a cleaner fit when you leave extra material for taping, shrinking, and final trimming.
You should compare room layouts when you decide on capacity. If your windows share similar dimensions, multi-window packs can simplify setup because you’ll work from one film style and one tape type.
How to install plastic window covering for winter
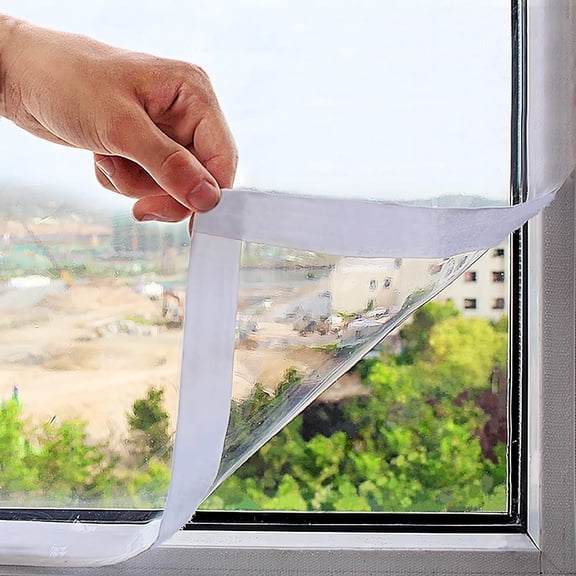
You can install a plastic window covering for winter with a few basic steps and common tools. First, you should clean and dry the trim so your tape bonds evenly around the frame.
Next, you should apply double sided window tape along each edge and press it firmly into place. Then you can place the film, smooth it by hand, and trim away large excess sections.
After the film sticks around the frame, you can use a standard household hair dryer to tighten the surface. You’ll notice wrinkles relax as warm air moves across the film in steady passes.
If you want neater results, you should start from the top edge and work downward. You’ll usually get cleaner corners when you avoid overpulling the film before shrinking it.
What to look for before you decide
You should compare kit type, installation location, window capacity, and film thickness before you choose. Those four decisions shape how your setup looks, how it installs, and how much trimming you’ll need.
When you match those details to your space, you can prep drafty windows with fewer surprises and a cleaner finish. You’ll feel more confident choosing a kit that fits your trim, tools, and window count.