
wall26 - Vibrant Teal Gradient Almond Blossom by Vincent Van Gogh - Wall Mural, Removable Sticker, Home Decor - 100x144 inches
Key item features
- The wall mural is cut into 6 pieces for easy installation, each in 100"x24",total size is 100"x144" (Height x Width)
- Very easy to apply, remove or reposition - Just PEEL & STICK!
- Unique and one of a kind exclusive designs by Wall26, for installation on flat dry surfaces indoor/outdoor walls doors and even windows
- Won't leave a mark when repositioned like other cheap stickers on the market, no residue left behind
Specs
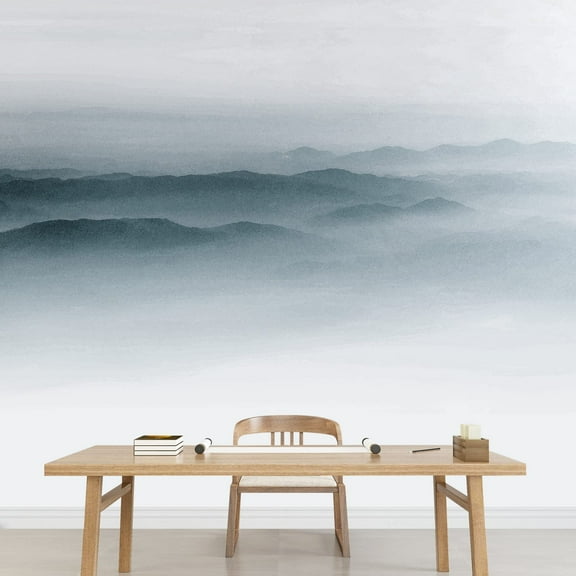
- PatternAlmond Blossom
- Wallpaper typeWall Mural
- MaterialWall Mural
- Roll length100 in
- FeaturesRemovable
- BrandWall26
- Free shipping
 Free 30-day returns
How do you want your item?
About this item
Product details
- The wall mural is cut into 6 pieces for easy installation, each in 100"x24",total size is 100"x144" (Height x Width)
- Very easy to apply, remove or reposition - Just PEEL & STICK!
- Unique and one of a kind exclusive designs by Wall26, for installation on flat dry surfaces indoor/outdoor walls doors and even windows
- Won't leave a mark when repositioned like other cheap stickers on the market, no residue left behind
Specifications
Pattern
Color
Wallpaper type
Material
Warranty
Warranty information
Warranty url
Popular items in this category
Best selling items that customers love
wall26 - Large Wall Mural - Light Blue Flowers on Teal Color Brick Wall Background | Self-Adhesive Vinyl Wallpaper/Removable Modern Wall Decor - 66x96 inches $64.00
 $6400current price $64.00
wall26 - Large Wall Mural - Light Blue Flowers on Teal Color Brick Wall Background | Self-Adhesive Vinyl Wallpaper/Removable Modern Wall Decor - 66x96 inches
Shipping, arrives in 3+ dayswall26 - Colorful Graffiti - Large Wall Mural, Removable Peel and Stick Wallpaper, Home Decor - 66x96 inches $64.00
 2 optionsAvailable in additional 2 options$6400current price $64.00Options from $64.00 – $119.00
wall26 - Colorful Graffiti - Large Wall Mural, Removable Peel and Stick Wallpaper, Home Decor - 66x96 inches
Shipping, arrives in 3+ dayswall26 - Large Wall Mural - Majestic Scene of The Galaxy | Self-Adhesive Vinyl Wallpaper/Removable Modern Decorating Wall Art - 100" x 144" $119.00
 $11900current price $119.00
wall26 - Large Wall Mural - Majestic Scene of The Galaxy | Self-Adhesive Vinyl Wallpaper/Removable Modern Decorating Wall Art - 100" x 144"
Shipping, arrives in 3+ dayswall26 - Japanese Garden Plants Over a Gold Textured Background - Wall Mural, Removable Sticker, Home Decor - 66x96 inches $64.00
 $6400current price $64.00
wall26 - Japanese Garden Plants Over a Gold Textured Background - Wall Mural, Removable Sticker, Home Decor - 66x96 inches
Shipping, arrives in 3+ daysIdea4wall 2pcs Lavender Bloom Elegant Floral Soft Purple and Lilac Tones Wall Murals, Removable Self-Adhesive Stick Wallpaper Large Wall Stickers for Home Decorative, 48"x108" $75.00
 10 optionsAvailable in additional 10 options$7500current price $75.00More options from $37.70
Idea4wall 2pcs Lavender Bloom Elegant Floral Soft Purple and Lilac Tones Wall Murals, Removable Self-Adhesive Stick Wallpaper Large Wall Stickers for Home Decorative, 48"x108"
Shipping, arrives in 3+ daysPeel and Stick Wallpaper Pink Sunset Clouds Sky Gradient Colors Smooth Light Modern Art Wall Mural Decor Self Adhesive and Removable 100in x 144in $89.99
 19 optionsAvailable in additional 19 options$8999current price $89.99More options from $69.99
Peel and Stick Wallpaper Pink Sunset Clouds Sky Gradient Colors Smooth Light Modern Art Wall Mural Decor Self Adhesive and Removable 100in x 144in
Shipping, arrives in 3+ daysMid-Century Modern Peel & Stick Wallpaper - 15.75x118 Inch Retro 1950s Atomic Design with Vibrant Colors, Removable Self-Adhesive for Walls Cabinets $44.87
 $4487current price $44.87
Mid-Century Modern Peel & Stick Wallpaper - 15.75x118 Inch Retro 1950s Atomic Design with Vibrant Colors, Removable Self-Adhesive for Walls Cabinets
Shipping, arrives in 3+ dayswall26 - Black Blue Background, Dark Colors, with Vintage Grunge Background Texture - Removable Wall Mural | Self-Adhesive Large Wallpaper - 66x96 inches $64.00
 $6400current price $64.00
wall26 - Black Blue Background, Dark Colors, with Vintage Grunge Background Texture - Removable Wall Mural | Self-Adhesive Large Wallpaper - 66x96 inches
Shipping, arrives in 3+ daysCherry Blossom Mural - Romantic Flower Wall Wallpaper, Nordic 3D Wall Mural For Living Room Bedroom, Floral Murals Wallpaper 98.4"W x 68.9"H (Not Peel and Stick) $58.99
 9 optionsAvailable in additional 9 options$5899current price $58.99+$1.99 shippingMore options from $18.99
Cherry Blossom Mural - Romantic Flower Wall Wallpaper, Nordic 3D Wall Mural For Living Room Bedroom, Floral Murals Wallpaper 98.4"W x 68.9"H (Not Peel and Stick)
Shipping, arrives in 3+ dayswall26 - Large Wall Mural - Landscape of Mountains Range in The Mist | Self-Adhesive Vinyl Wallpaper/Removable Modern Wall Decor - 66x96 inches $64.00
 $6400current price $64.00
wall26 - Large Wall Mural - Landscape of Mountains Range in The Mist | Self-Adhesive Vinyl Wallpaper/Removable Modern Wall Decor - 66x96 inches
Shipping, arrives in 3+ daysIDEA4WALL Wall Murals for Bedroom Dream Castle Large Removable Wallpaper Peel and Stick Wall Stickers $142.99
 2 optionsAvailable in additional 2 options$14299current price $142.99More options from $83.99
IDEA4WALL Wall Murals for Bedroom Dream Castle Large Removable Wallpaper Peel and Stick Wall Stickers
25 out of 5 Stars. 2 reviewsShipping, arrives in 3+ daysIdea4wall 2pcs Dandelion Dream Modern and Minimalist Floral Wall Murals, Removable Self-Adhesive Stick Wallpaper Large Wall Stickers for Home Decorative, 48"x108" $75.00
 10 optionsAvailable in additional 10 options$7500current price $75.00More options from $37.70
Idea4wall 2pcs Dandelion Dream Modern and Minimalist Floral Wall Murals, Removable Self-Adhesive Stick Wallpaper Large Wall Stickers for Home Decorative, 48"x108"
Shipping, arrives in 3+ dayswall26 - Night Sky with Stars and Moon - Removable Wall Mural | Self-Adhesive Large Wallpaper - 100x144 inches $142.99
 2 optionsAvailable in additional 2 options$14299current price $142.99More options from $64.00
wall26 - Night Sky with Stars and Moon - Removable Wall Mural | Self-Adhesive Large Wallpaper - 100x144 inches
15 out of 5 Stars. 1 reviewsShipping, arrives in 3+ daysFloral Wallpaper Peel and Stick, Vintage Wallpaper Wall Stick Black Rose Removable Vinyl Wallpaper Sketch Floral Wall Mural Wall Decor 15.7"W X 98.4"L $35.19


 $3519current price $35.19More options from $30.19
Floral Wallpaper Peel and Stick, Vintage Wallpaper Wall Stick Black Rose Removable Vinyl Wallpaper Sketch Floral Wall Mural Wall Decor 15.7"W X 98.4"L
23 out of 5 Stars. 2 reviewsShipping, arrives in 3+ dayswall26 - Lone Tree on a Field of Purple Flowers as The Sun Rises Viewed from Sliding Door - Creative Wall Mural, Peel and Stick Wallpaper, Home Decor - 66x96 inches $64.00
 $6400current price $64.00
wall26 - Lone Tree on a Field of Purple Flowers as The Sun Rises Viewed from Sliding Door - Creative Wall Mural, Peel and Stick Wallpaper, Home Decor - 66x96 inches
Shipping, arrives in 3+ daysAbyssaly 17.7" x 236" Floral Peel and Stick Wallpaper Floral Waterproof Wallpaper Vintage Wall paper for Decoration Bedroom Home Wall $17.99
 7 optionsAvailable in additional 7 options$1799current price $17.99More options from $10.99
Abyssaly 17.7" x 236" Floral Peel and Stick Wallpaper Floral Waterproof Wallpaper Vintage Wall paper for Decoration Bedroom Home Wall
294.6 out of 5 Stars. 29 reviewsSave with Shipping, arrives tomorrow
Customer ratings & reviews
Customer images

Showing 1-3 of 4 reviews
Verified Purchase
Love the product!
Amazing and beautiful. I am always skeptical but it was great. It arrived, there are four panels they even have a small over lap so you can match panels perfectly and the are numbered 1-4 so its super easy and it adheres great! I just out it on today and have orders four more.
Big impact
Just what I wanted. I love it!
This review includes some tips for installation
We bought the yellow textured almond blossoms to create an accent wall in our master bedroom. We purchased it directly from Wall26, and it was a bit more expensive than it would have been on Wall26. The colors range from a brownish gold to a very light yellow, with white blossoms and olive green branches, with a few small spots of salmon. The image is very slightly pixilated but looks fine even from a short distance. The vinyl is thick, so it won't tear even if it sticks to itself while you are trying to apply it and you need to peel it apart. The pattern matches well with about a .5 inch overlap. The adhesive is good enough to attach to lightly textured walls (orange peel in our case; see picture #1). We've had it up about a month and it appears very solidly attached. I did have to peel it off the wall to readjust it a couple of times, and it did not damage the paint or the drywall at all, but this was before it was thoroughly stuck. If we remove it and see damage, I will update this review.I, a middle aged woman, put it up by myself, not entirely successfully (I'd give myself a B). It took me about 3 hours, after the wall was clean and dry, and this included trimming out a switch plate and an outlet, as well as trimming the edges. Because I put up the first panel slightly crooked by mistake, I struggled with matching the pattern for panels 1-3. I straightened panel 3, which left a small gap down at the bottom between panels 2 and 3 (see picture #2), where it is hidden by a piece of furniture, and then I straightened panel 4 very slightly. I ended up with a few very small creases in a couple of places, which are almost invisible and are due to my error in putting the first panel up not perfectly vertically. By the time I got to panel 5, everything was straight and the overlap between panels 4 and 5 is perfect (see picture #3), but all the other overlaps are not perfect and the mistakes are visible (though not obvious). I used some of the excess I trimmed off the bottom to cover up a few gaps between the top of the panels and the ceiling. It looks good enough (see picture #4 for final result) that I am not going to redo it, but I definitely wish I had known what I know now about the installation process. I deducted a star because the instructions left a lot to be desired. I would give the product itself 5 stars.I watched some Youtube videos for installation tips and found them lacking, so here are my recommendations:1. Start with a clean wall. I used a 50% vinegar/50% water solution to wipe it down, then let it dry for a couple of hours.2. Remove any switch plates and outlet covers.3. ***** REALLY IMPORTANT***** Use a plumb line or a level to draw a vertical line on the wall from the ceiling to the floor where the outer edge of the first panel will be. I did not do this; big mistake. Do not use the ceiling, a wall, or a door frame to line it up; these may not be perfectly level.4. Consider enlisting a helper. This may not be completely necessary, but I suspect it would make the process quicker and easier.5. ***IMPORTANT*** Leave an inch at the top rather than trying to line up the first panel with the ceiling. Few ceilings are perfectly even. Consider leaving a quarter inch on the wall side as well in case your walls are not perfectly perpendicular.6. Climb the stepladder first, then carefully peel back about 18 inches from the top. Be very careful to avoid getting the panel stuck to itself (more of a risk if you peel before climbing).7. With your helper holding the middle of the panel, line it up vertically with the pencil line and stick it to the wall, leaving an extra inch at the ceiling. Take as much time as you need to line it up.8. Starting from the middle of the panel, use a rag to "wipe" it outwards to attach it firmly to the wall. It is also possible to use a scraper, but I didn't want to take the risk of tearing it on a textured wall. A rag works fine.9. Have your helper peel back another 18 inches, then attach that section, carefully following the vertical line on the wall. Use the rag (or scraper) to ensure that section is attached.10. Repeat step 9 as needed, working your way down the wall about 18 inches at a time.11. If you have a switch that sticks out, you may want to cut a small hole around the switch using a sharp exacto knife before the wiping down step to make sure it is smooth. You can trim out the hole larger, along with holes for outlets, at the end of the entire process, but very bulgy switches that stick out could interfere with placement, so I recommend making the hole as you come to it rather than after the panel is attached all the way to the floor.12. For the second and subsequent panels, you may not need to draw a vertical line on the wall, since you will have the first panel to line up with. Take your time and use your helper. Use the same process as above, working your way down the wall 18 inches at a time.13. After all panels are installed, use the exacto knife to trim around the edges, including the ceiling. Trim very carefully the holes around switch plates and outlets. It's fine to trim these in sections.14. Reattach switch plates and outlet covers.Hope this is helpful.
