Instructions
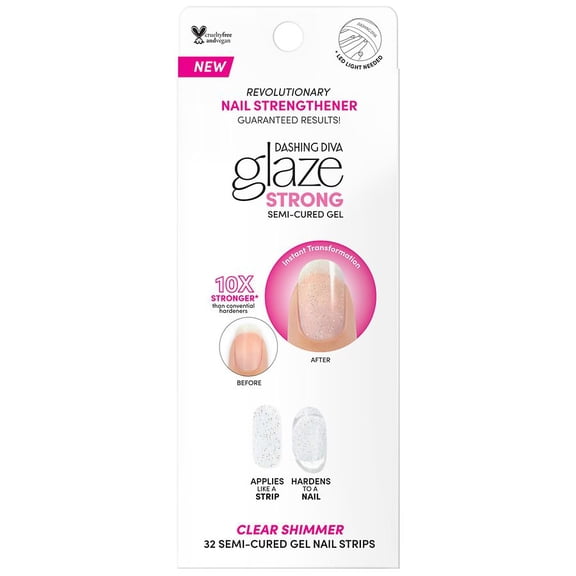
STEP 1: PREP •Wash hands with soap and water. • Shape nails and push back cuticles. • Use an alcohol prep pad or acetone remover to ensure nails are clear from oils and residue. • Make sure your nails are completely dry before application. Pro Tip: Try Red Therapy Base Seal Treatment for Gloss to protect and strengthen natural nails before application and even after removal. STEP 2: SELECT SIZE • Select strip size for each nail. For optimal fit, the strip should not exceed past the nail bed onto skin or cuticles. • Gently lift strip from sheet starting from edge. Pro Tip: If you are in between sizes always choose the smaller size for proper adhesion. Pro Tip: Use a tweezer to lift strip from sheet more easily and limit compromising the adhesion. STEP 3: APPLICATION • Place strip over the center of your nail, starting at cuticle line and pressing outward. • Press down firmly from center and side to side. Pro Tip: Make sure strip is applied slightly above cuticle line, avoiding placement on skin. STEP 4: FINISH • Fold over excess material • Using the white side of the file, file downward firmly in one direction making sure the file is positioned vertically and not angled over the free edge. • Smooth out nail edge with pink side of the file making sure that nail edge is clean and free from excess strip remains. Pro tip: If you have excessive material when folding strip over nail edge, trim with a scissor or nail clipper before filing. Pro tip: For optimal adhesion, avoid exposing nails to lotions, oils or water for at least one hour after application. HOW TO REMOVE: • Apply a drop of cuticle oil or acetone remover onto your nail. • Use manicure stick to gently and slowly lift nail strip from corner of the cuticle area. • Gradually roll the strip off your nail. CAUTION: Do not peel off with force or in one quick motion